Feb, 2016
How do I setup Static CDN Filters with KeyCDN?
KeyCDN is an alternative to Amazon CloudFront and MaxCDN that can be integrated with Comet Cache Pro through the Static CDN Filters. To integrate Comet Cache with KeyCDN, you'll need to create a new Zone inside your KeyCDN account with a Zone Type of "Pull" and then supply Comet Cache Pro with the Zone "URL" provided by KeyCDN.
Step-by-Step: Integrating Comet Cache Pro with KeyCDN
Login to your KeyCDN account and create a new Zone by visiting Zones → New Zone.
In the General Zone Settings, enter a name identifier in the Zone Name field (letters and numbers only). This will be added to the Zone URL that KeyCDN generates--if your Zone URL ends up being
example-146b.kxcdn.com, theexampleportion is what gets entered in the Zone Name field. Set the Zone Status to Active and the Zone Type to Pull. Then click the Show Advanced Features checkbox--there is one Advanced Feature we need to change.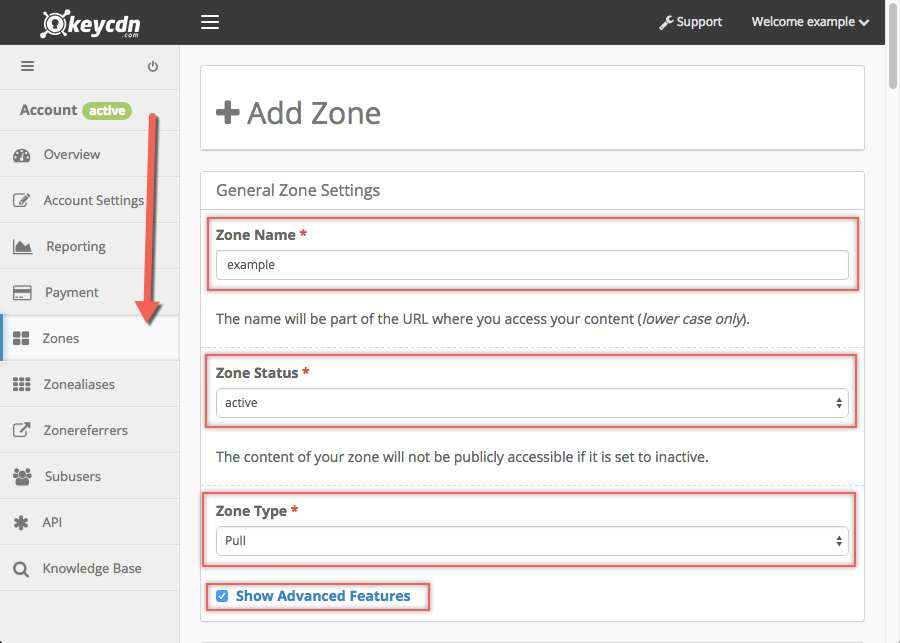
Scroll down to the Pull Zone Settings section and enter your website URL in the Origin URL field. Note that this value should be exactly as it appears on your site. If you use http://www.example.com, you should enter
http://www.example.com. If you use http://example.com, you should enterhttp://example.com.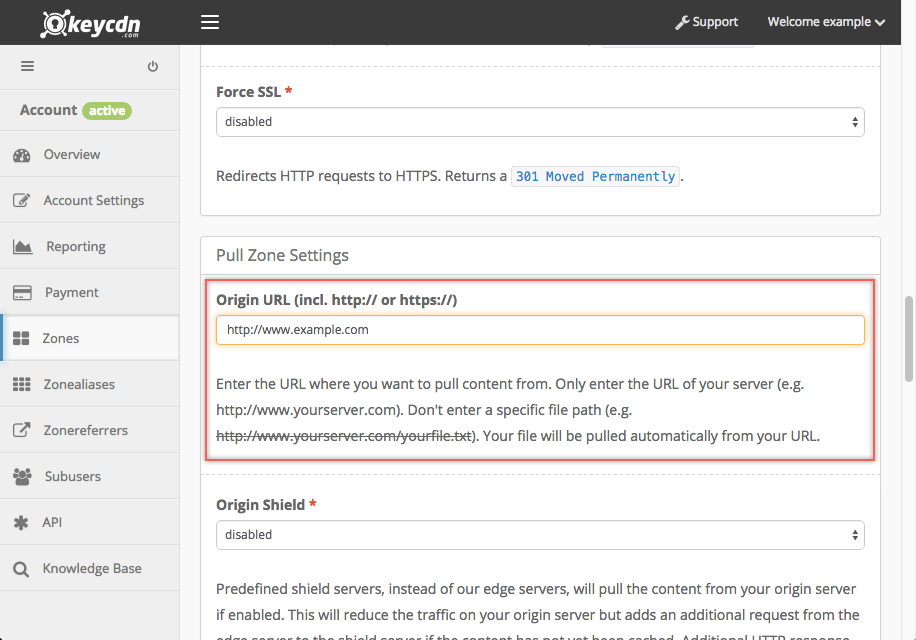
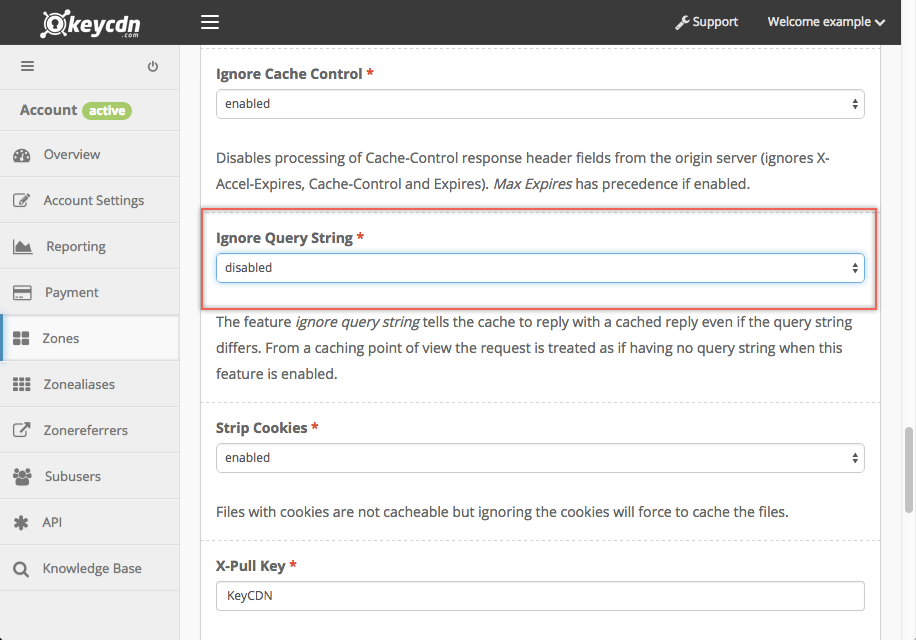
Scroll down further to the Ignore Query String advanced option and change this to Disabled.
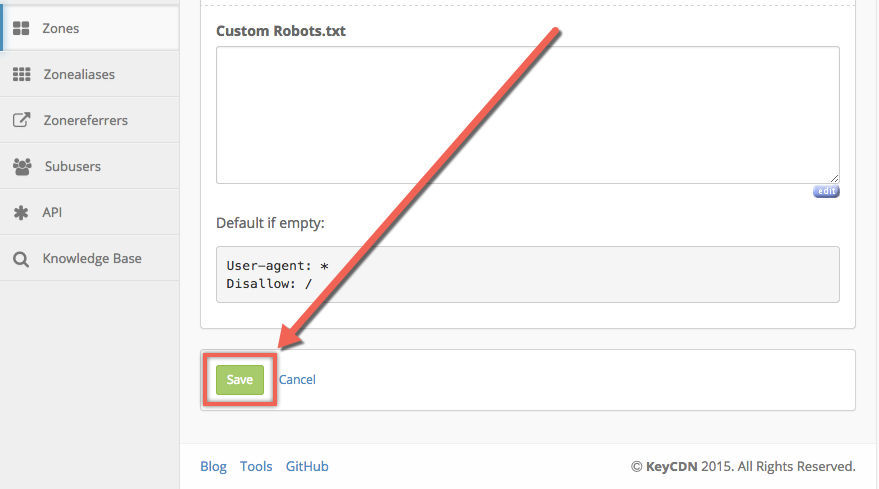
Save your new Zone by clicking the Save button at the bottom.
KeyCDN will now deploy your new Zone. This will take a few minutes and you'll see a green progress bar while this is happening. When this process finishes and the green bar goes away, you can copy the URL for the Zone and use that to configure Comet Cache Static CDN Filters in the next step.
Important: You must wait until KeyCDN has finished deploying the Zone before you use it with Comet Cache Pro, otherwise you may end up with broken links on your site.
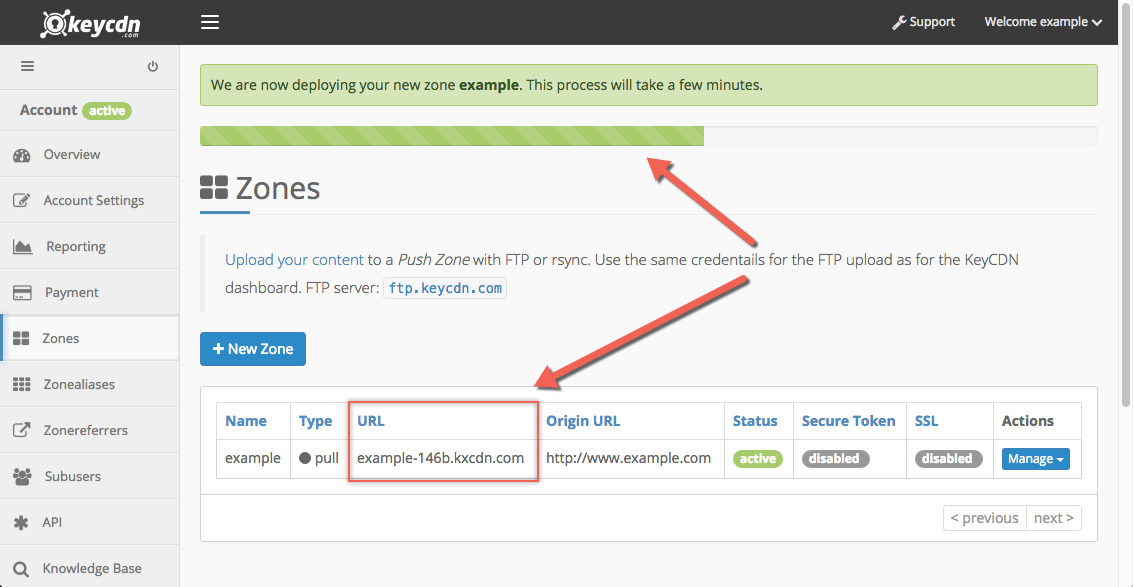
Copy the Zone URL for the new Zone that you just created (it should look something like
example-146b.kxcdn.com) and paste that into the CDN Hostname field in WordPress Dashboard → Comet Cache → Plugin Options → Static CDN Filters. You'll also want to make sure Static CDN Filters is enabled and set to "Yes, I want CDN filters applied".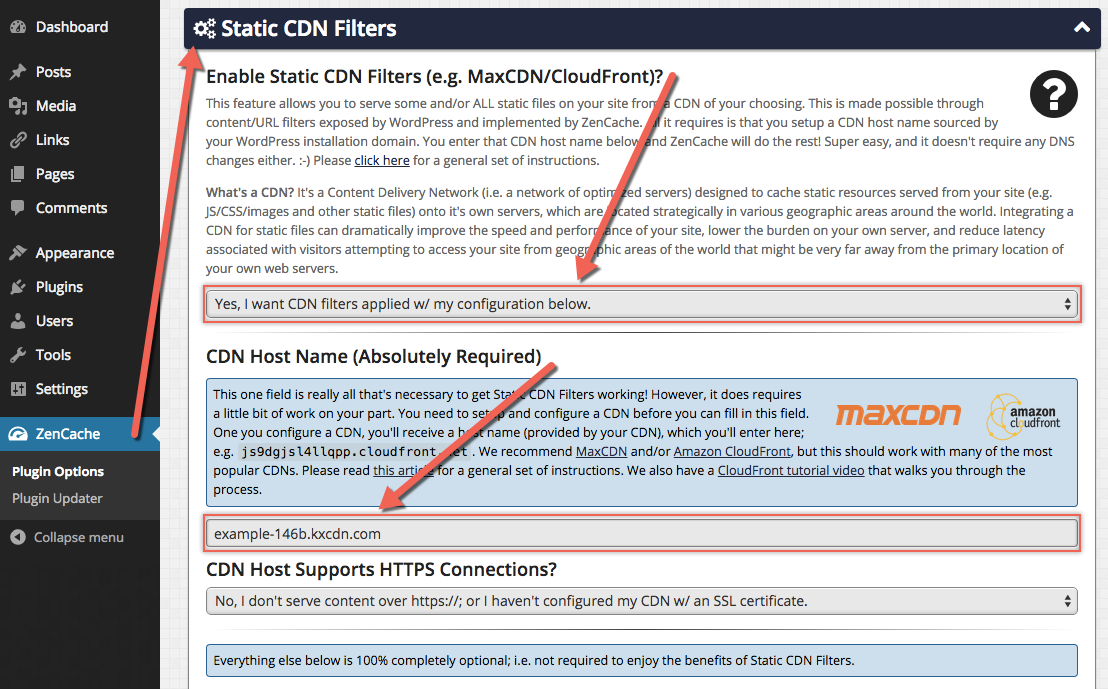
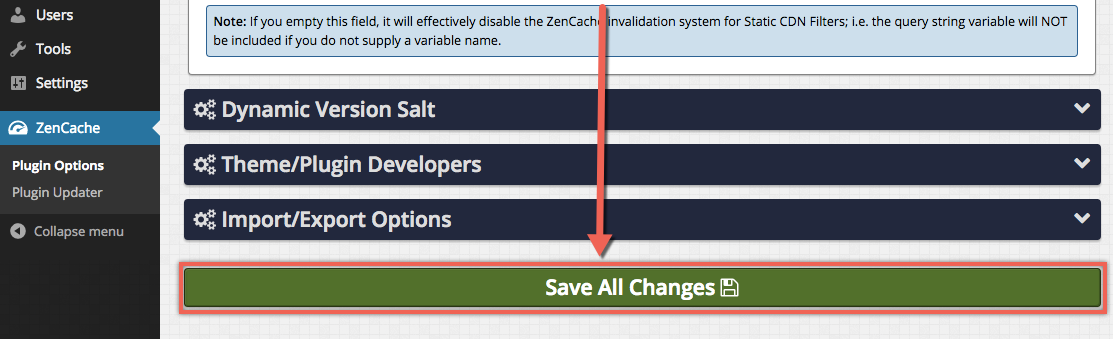
When you're finished, click the Save All Changes button at the bottom to save your Comet Cache configuration.
That's it! Comet Cache Pro is now configured with your KeyCDN account. If you logout of your WordPress Dashboard and visit your site, you'll see that all static resources (CSS files, JavaScript files, images, etc.) are loaded with URLs that start with something like http://example-146b.kxcdn.com/, which indicates that the Comet Cache Pro CDN Integration is now working.
See Also: